1First steps
Chapters 1 to 3 are for everyone, the rest cover approvals and administration.
- Your company adds you to WP-Expenses. You get an e-mail invitation or a temporary password.
- Sign in in the browser at expenses.wpsolutions.ch or in the app.
- Forgot your password? Choose Forgot password? on the sign-in page.
2Capture a receipt
It’s quickest with your phone, right after paying.
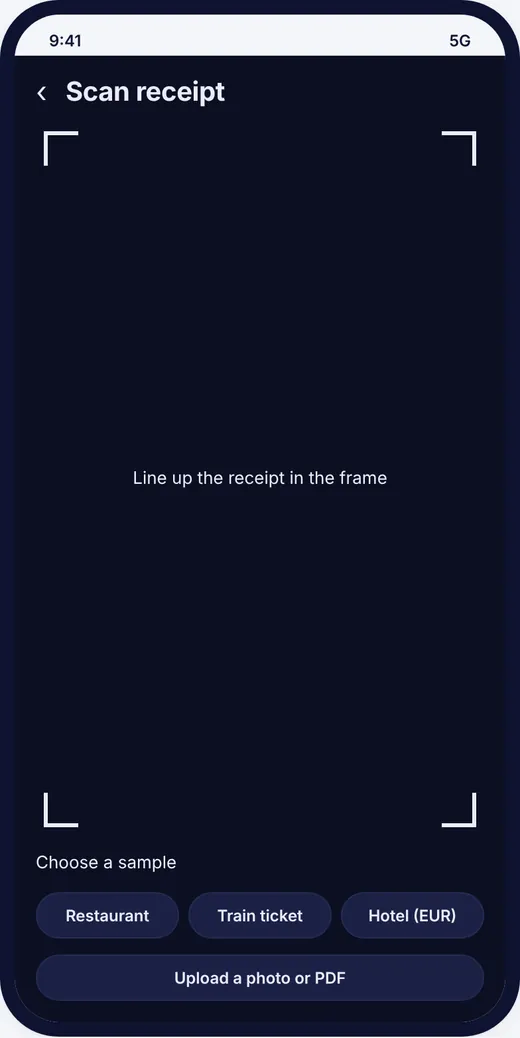
- Tap the camera button and photograph the receipt. You can also choose a photo or PDF.
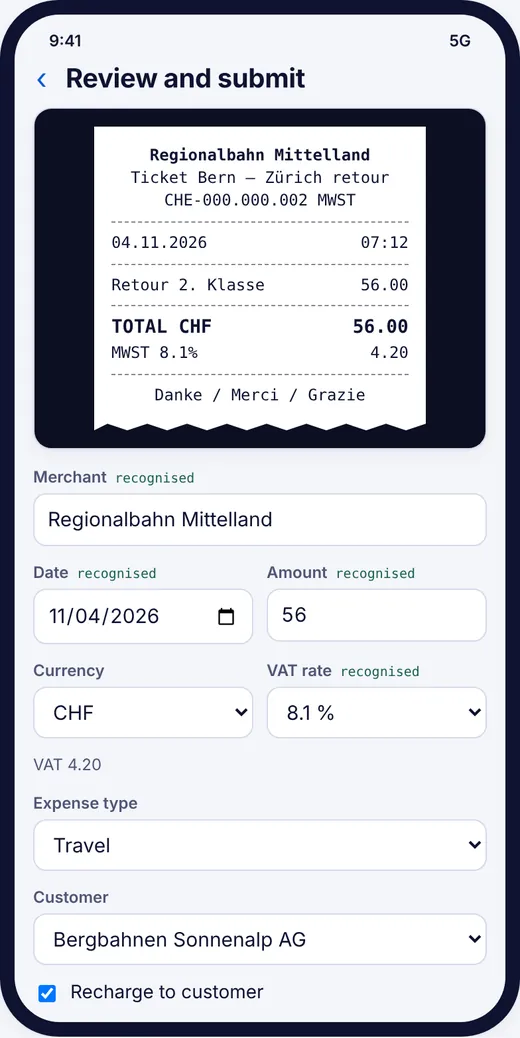
- The receipt is read on the server. Check Merchant, Date, Amount and VAT rate.
- Choose the Expense type and, if needed, the Customer.
- For customer entertainment, enter Guests and occasion.
- Tap Submit.
TipKeep the receipt flat and well lit. If a value is wrong, correct it by hand.
3Follow the status
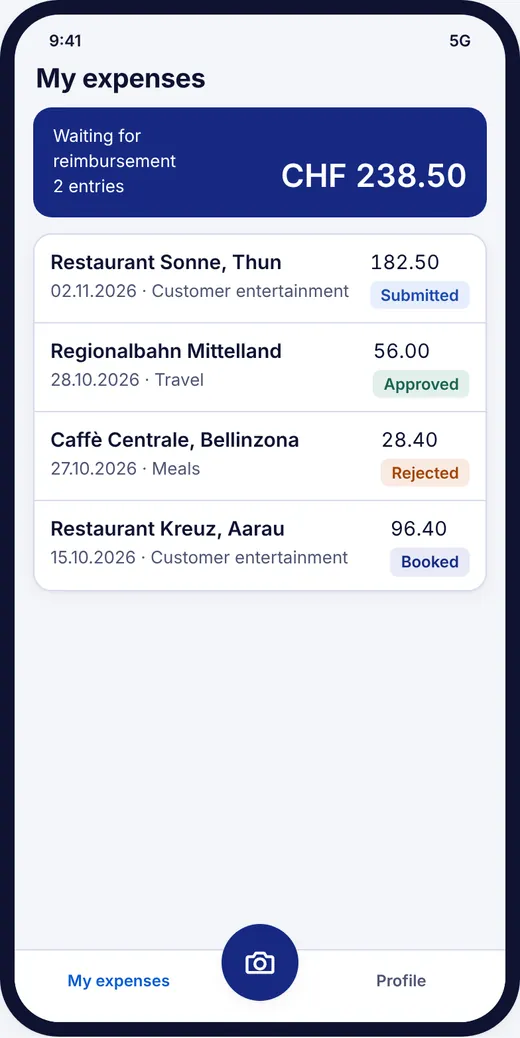
The expenses list shows all your receipts.
- Submitted: waiting for approval.
- Approved: will be reimbursed.
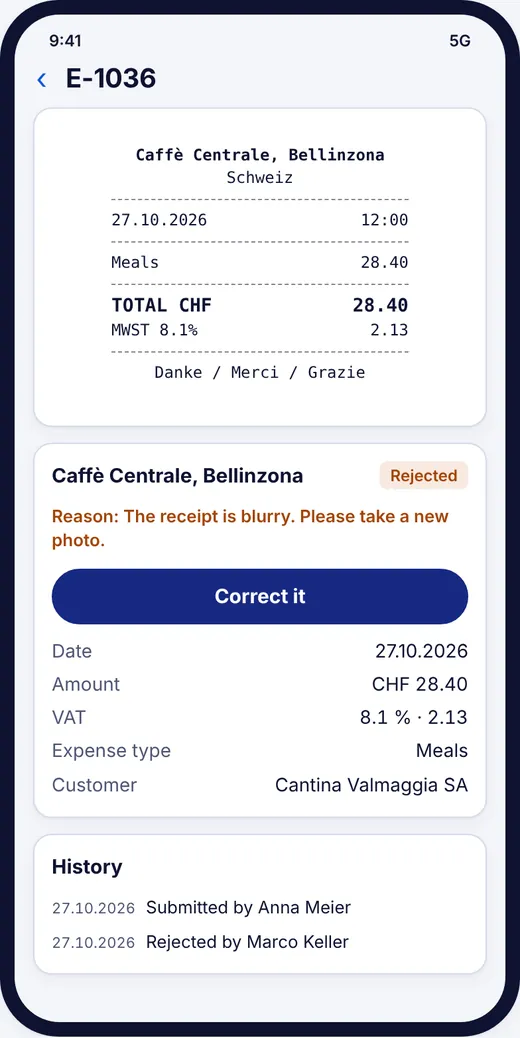
- Rejected: open the expense, read the reason, correct it and submit it again.
- Booked: transferred to accounting.
4Approve expenses
For managers and approvers, in the app or the browser.
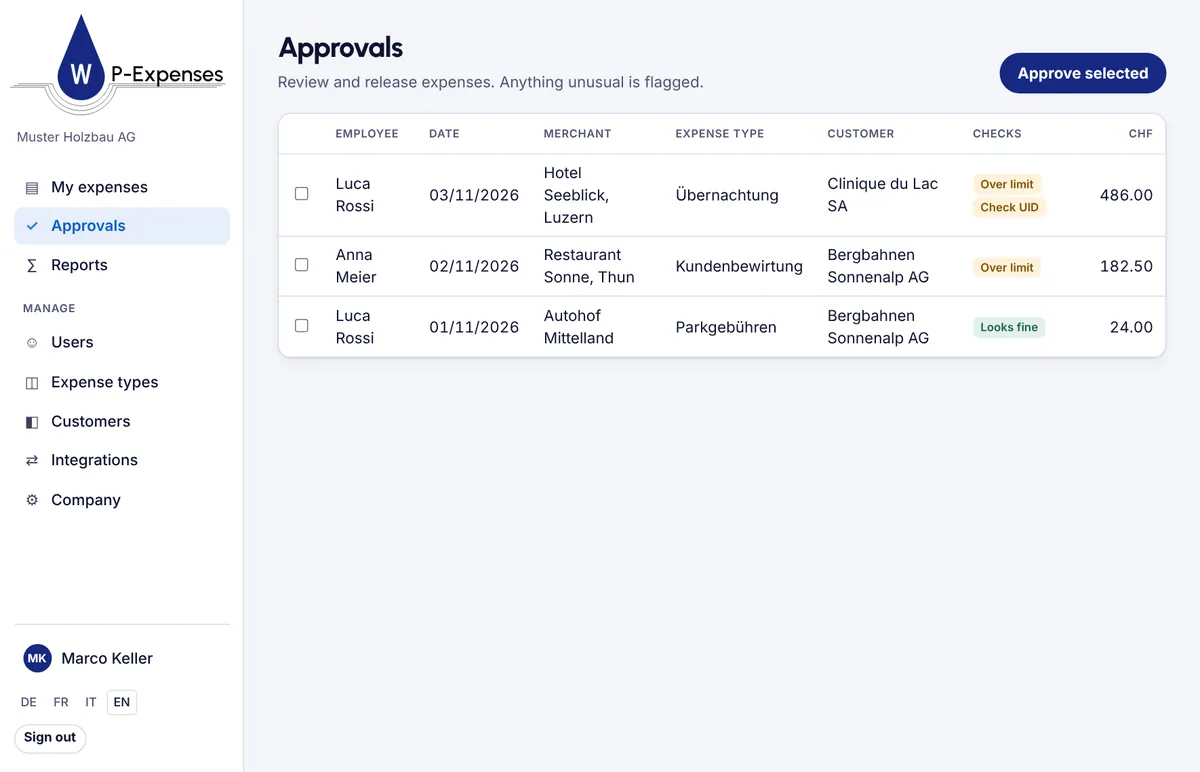
- Open Approvals. Anything unusual is flagged: over limit, check UID, guests missing, no receipt, possible duplicate.
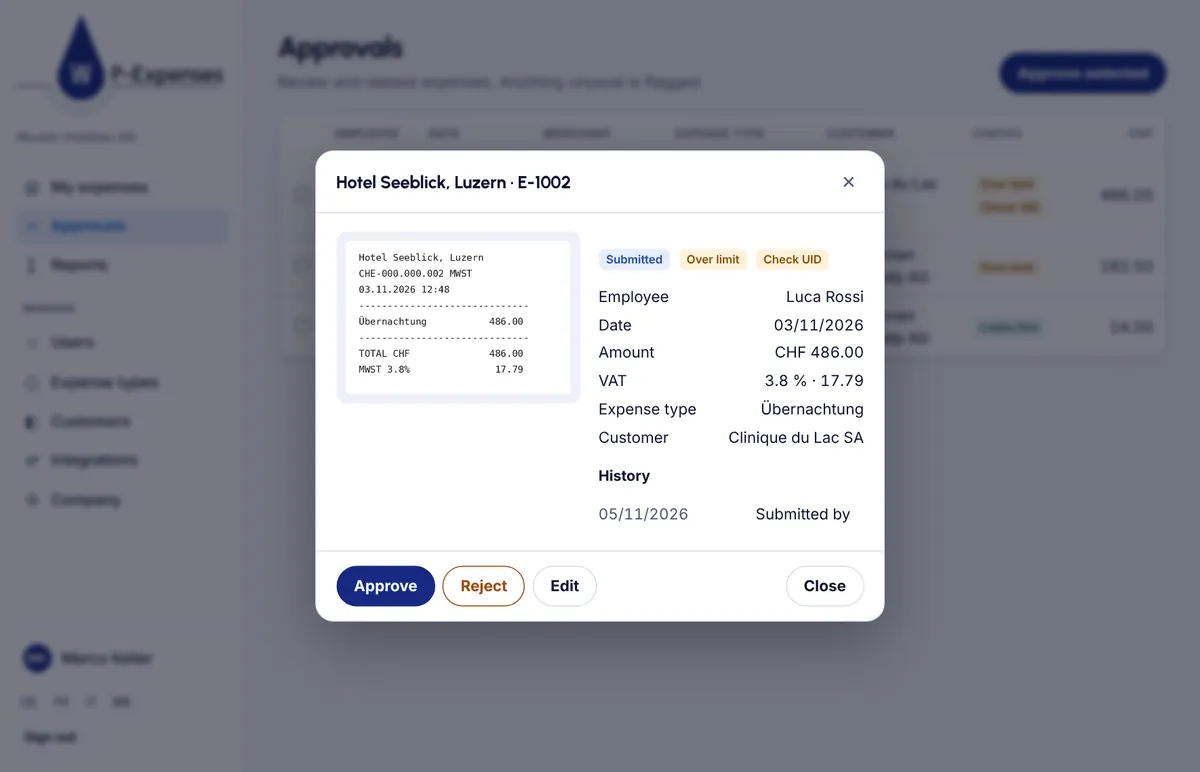
- Open an expense and check the receipt.
- Choose Approve or Reject. A rejection needs a reason.
- In the browser, Approve selected handles several expenses at once.
TipYou can only approve your own expenses if your company allows it in the settings.
5Reports
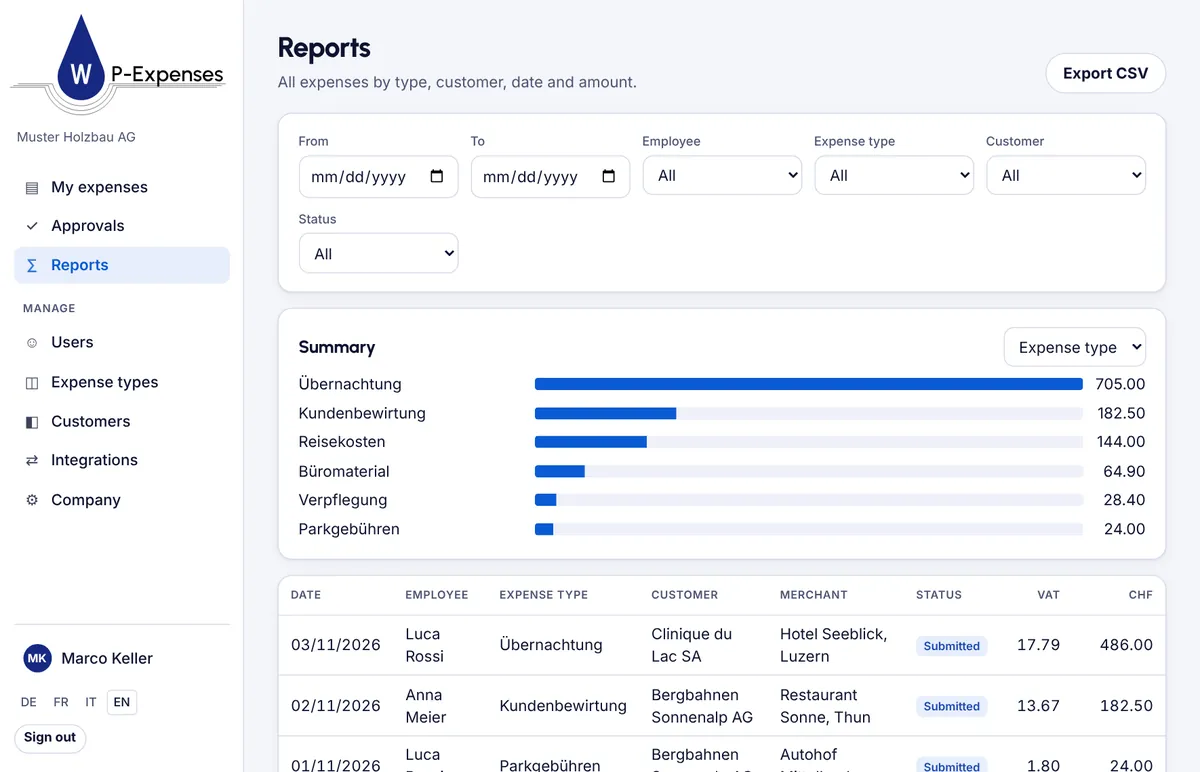
All expenses by type, customer, date and amount.
- Open Reports and set the filters.
- Group the summary by expense type, customer or employee.
- Export CSV gives you the list for Excel.
6Set up your company
For managers, in the browser.
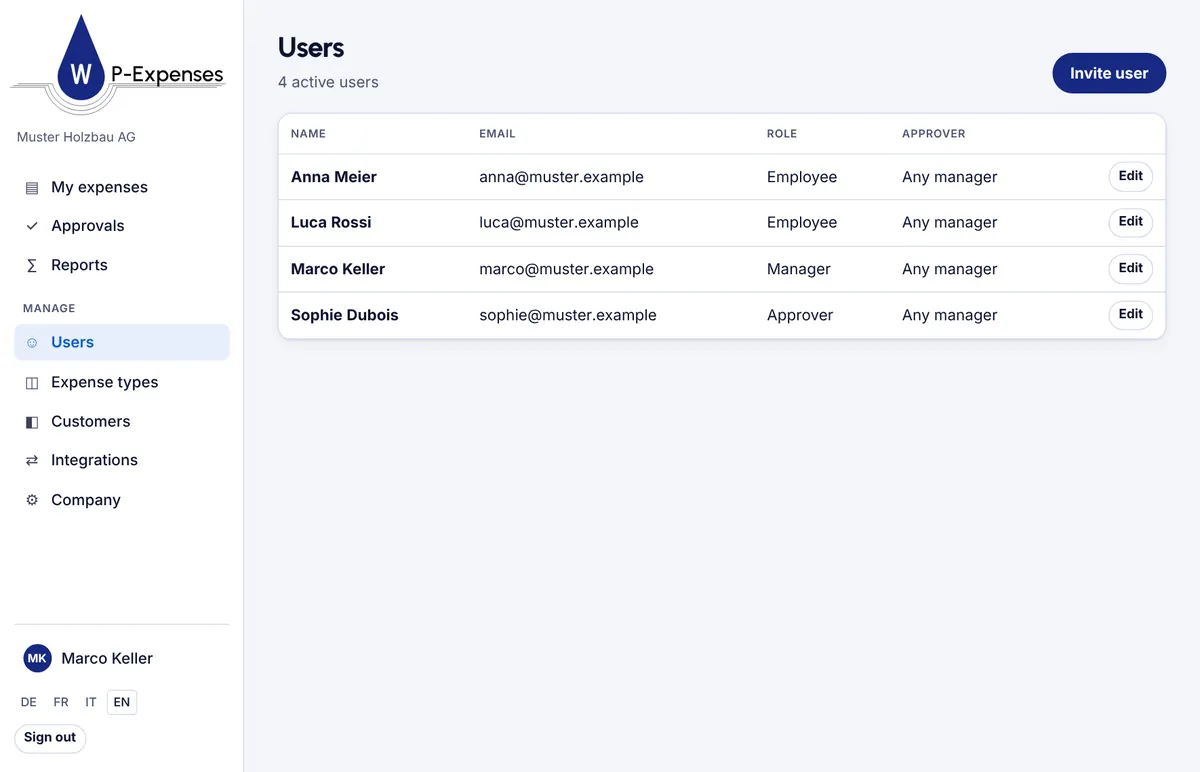
- Users: invite people and assign roles: employee, approver, manager or read-only (fiduciary). You can set who approves for each person.
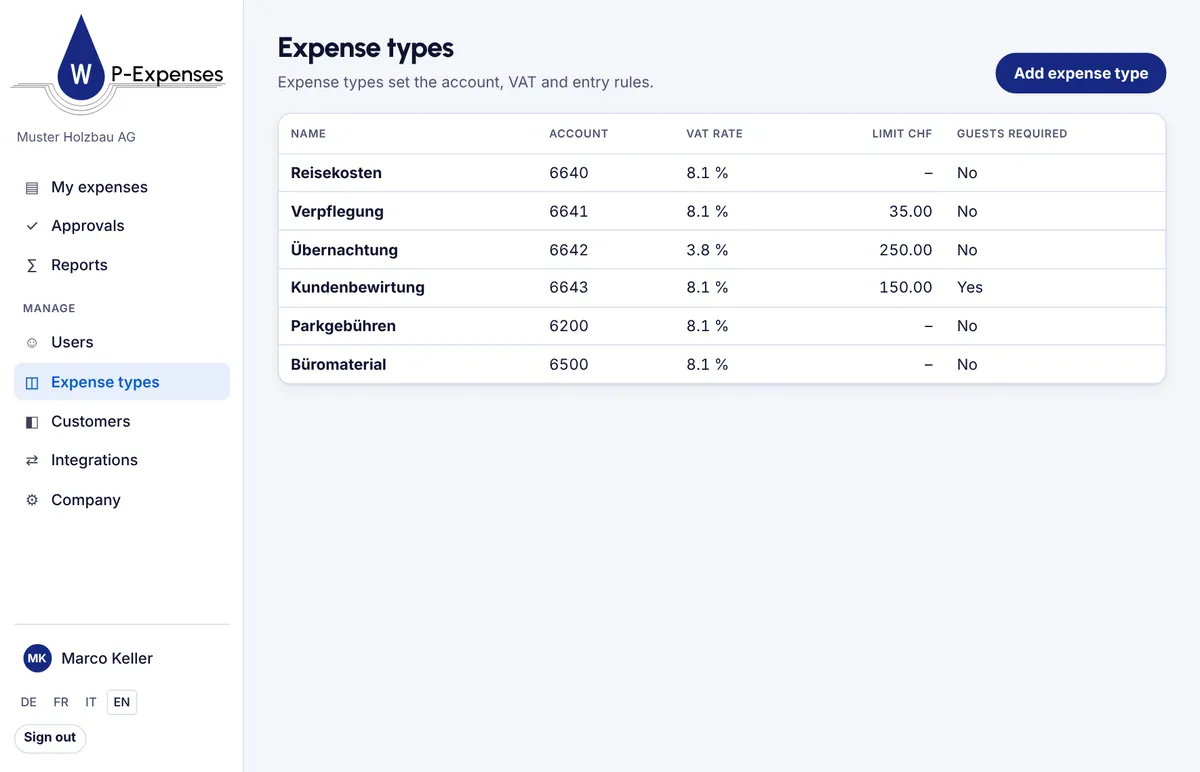
- Expense types: name, account, VAT, limit and whether guests are needed.
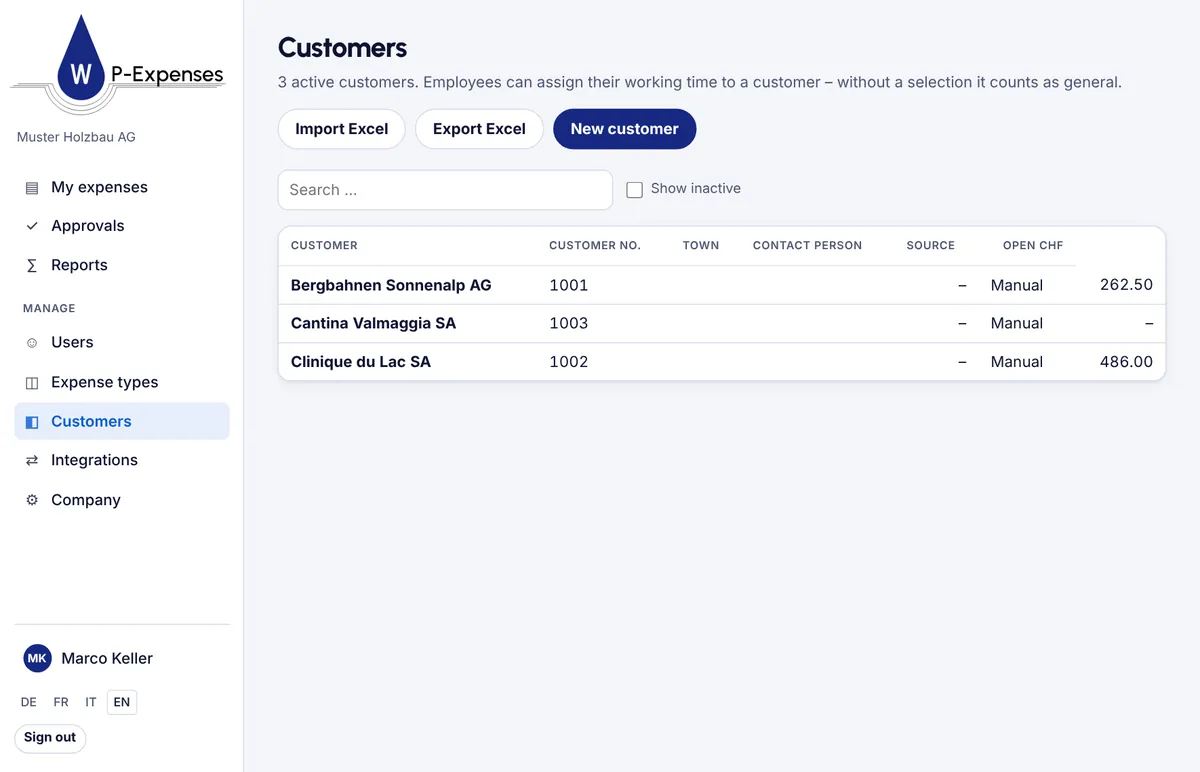
- Customers: add by hand, import from Excel or take over from bexio.
- Company: account for money owed to employees, rates and rules.
7bexio and Abacus
Send approved expenses to accounting.
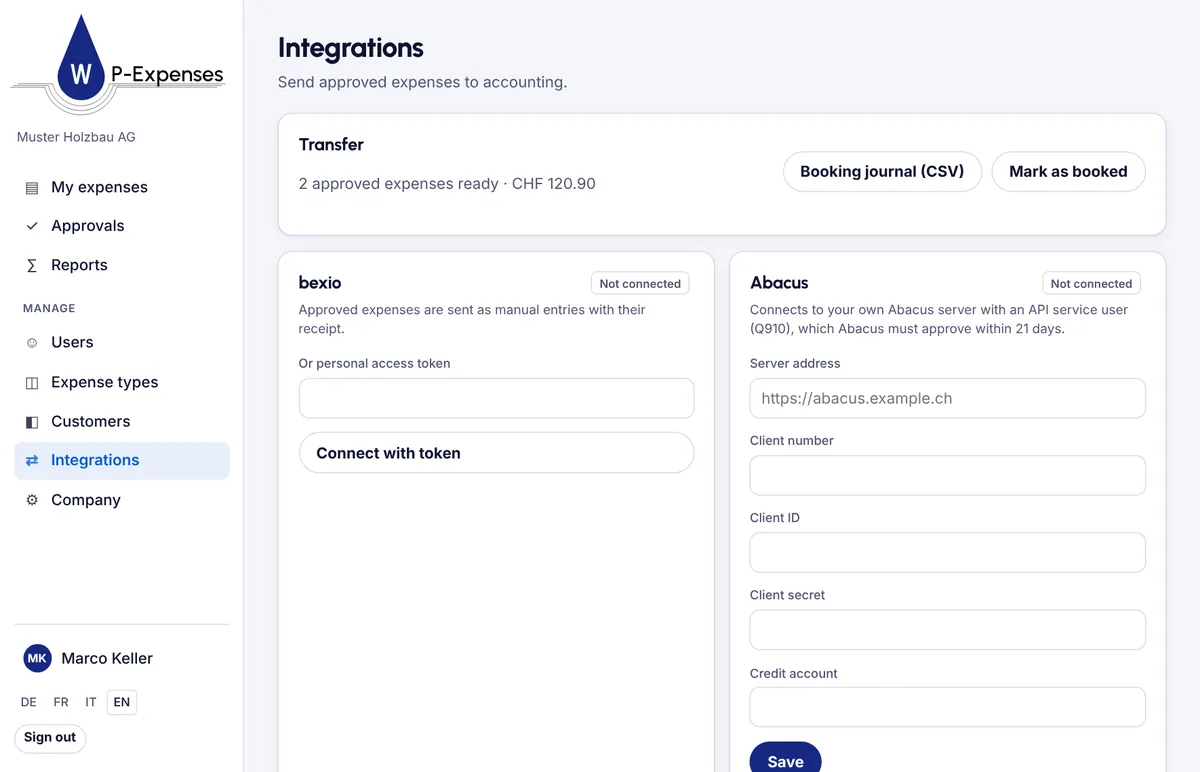
- bexio: connect under Integrations. Expenses are sent as manual entries with their receipt, and accounts are matched by number.
- Abacus: your Abacus partner sets up an API service user (Q910). Enter the server, client number, client ID and secret, then test the connection.
- Other systems: download the Booking journal (CSV), then choose Mark as booked.
- Choose Send to. Booked expenses are locked.
More questions?
You’ll find answers in the help pages, or write to us.