1Getting started
Chapters 1 to 7 are for all employees; from chapter 8 on, they cover the tasks of managers.
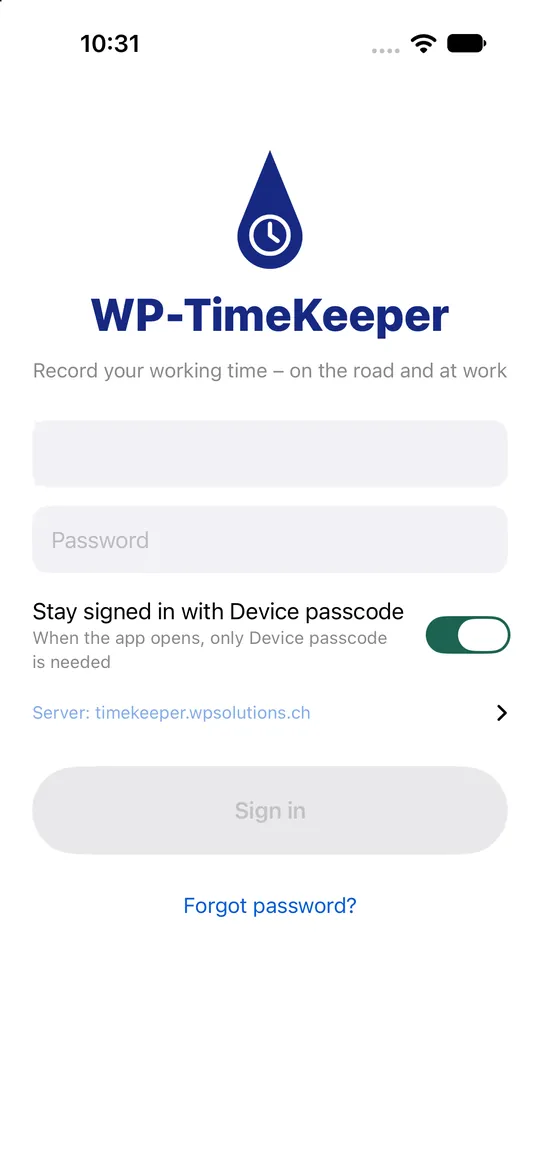
- Your company adds you to WP-TimeKeeper. You get an invitation by e-mail and choose your password (at least 10 characters). If you were given a temporary password instead, you choose your own at the first sign-in.
- Sign in with your browser at timekeeper.wpsolutions.ch or in the app on iPhone, iPad or Android – with the same e-mail address and password everywhere.
- Forgot your password? Tap Forgot password? when signing in. You get a link that is valid for 60 minutes.
2Tracking time with the timer
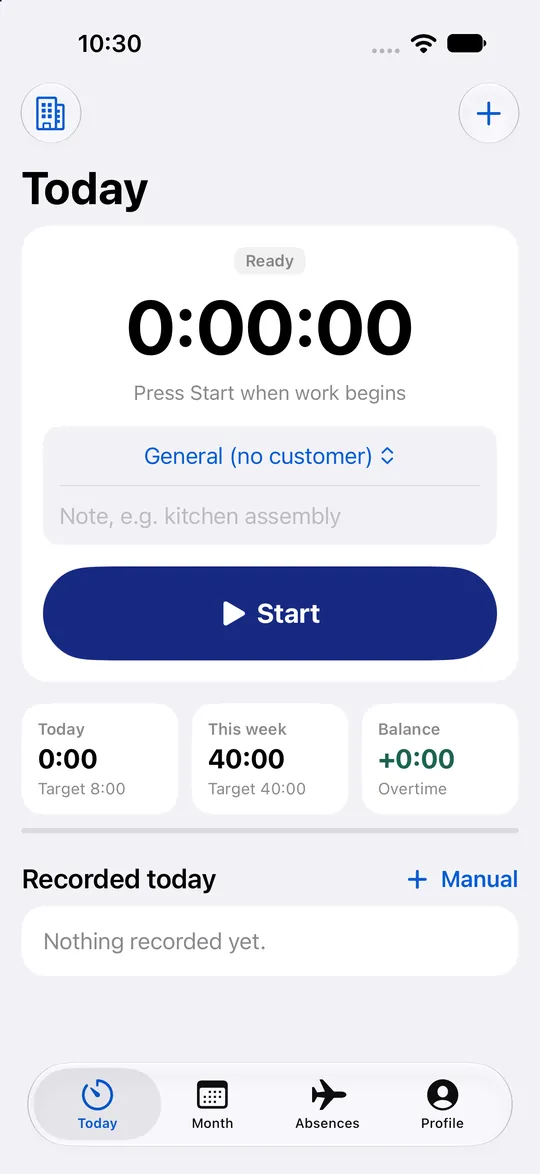
The easiest way: start when work begins, stop when it ends.
- Open Today. Choose a customer or leave General (no customer). A note is optional.
- Tap Start. Pause and Resume interrupt your work.
- At the end, tap Stop. The time appears under Recorded today.
3Entering and changing times by hand
For anything you want to add or correct.
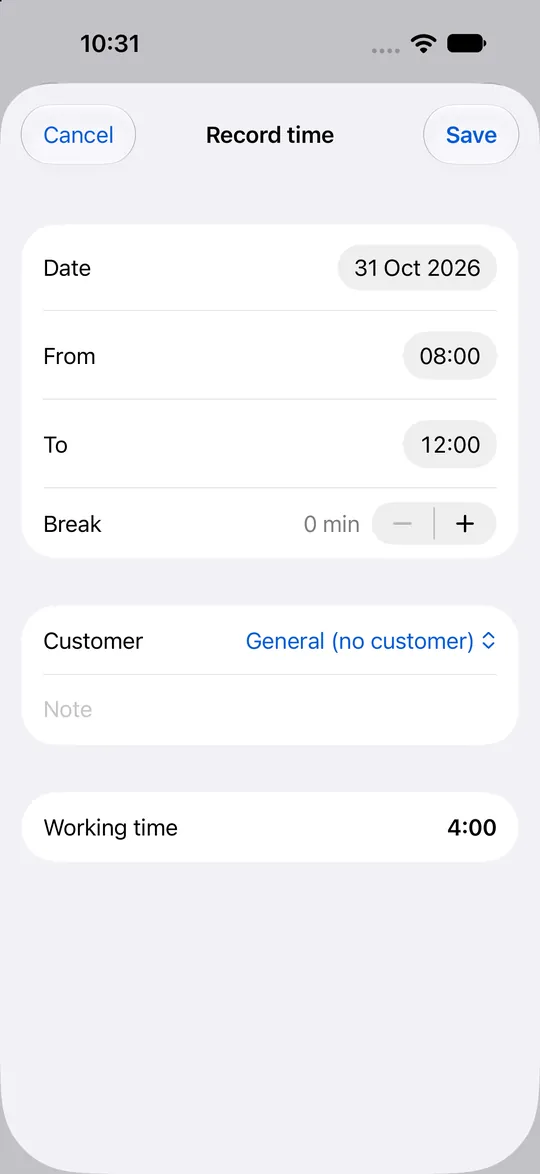
- In Today, tap Manual or + at the top right.
- Choose the date, from, to and break, plus a customer and note if needed, and tap Save.
- To change an entry, tap it. To delete it, press and hold.
4Month and overtime balance
This is where you see how you stand.
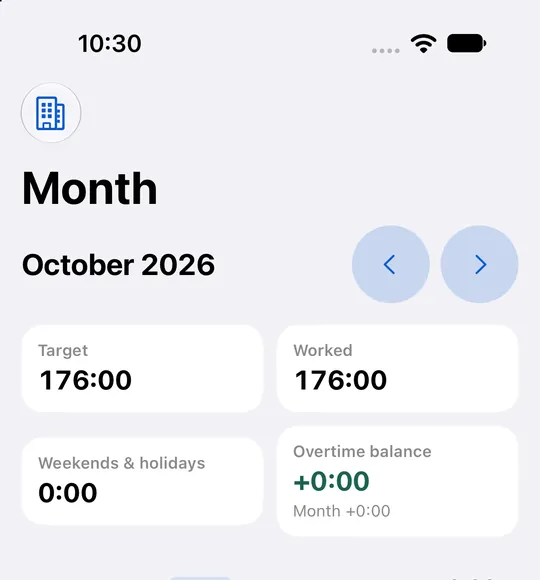
- Open Month. At the top are target, worked hours, weekend and holiday work, and your overtime balance.
- Below is every day with its entries, public holidays, closures and absences.
- The arrows change the month.
5Holidays and absences
Request time off, follow the status and watch your holiday balance.
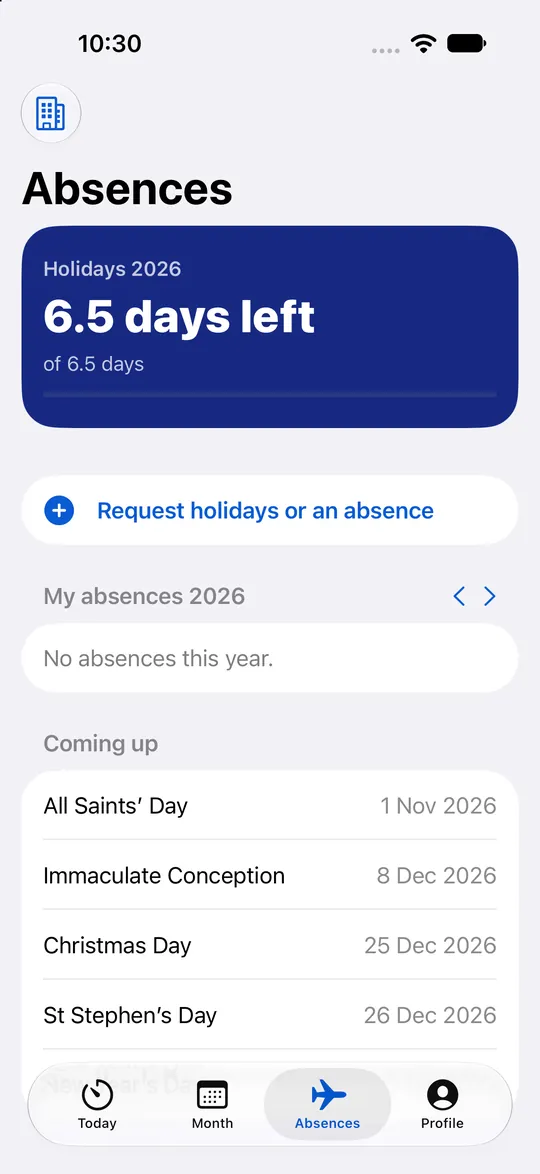
- Open Absences. At the top you see how many holiday days you have left.
- Tap Request holidays or an absence, choose the type and period, and send the request.
- Your manager approves or rejects it; the status appears on your request.
- To withdraw an open request: swipe left on iPhone, tap it on Android.
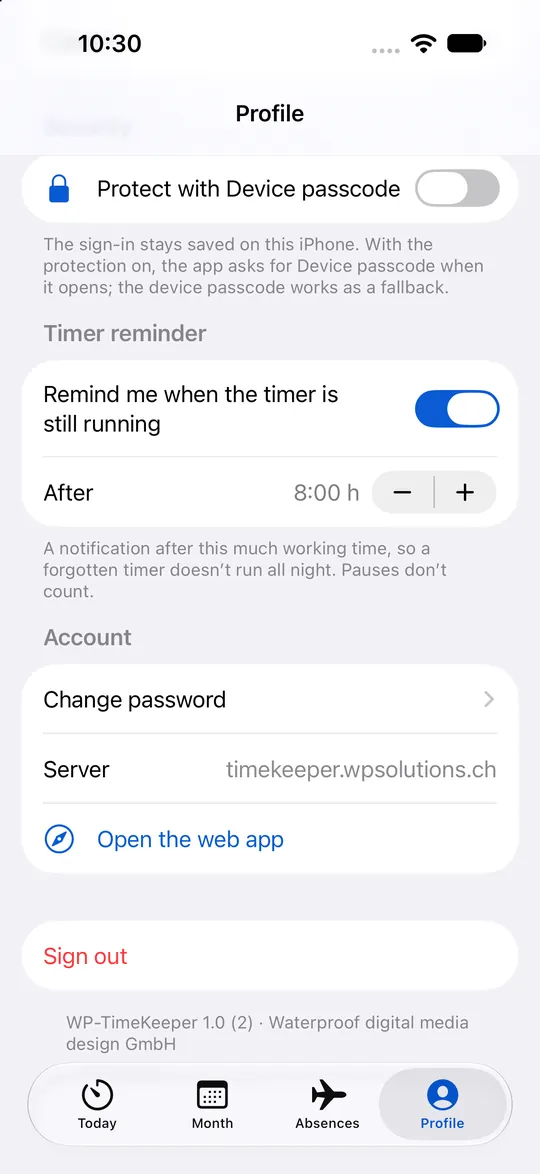
6Profile, reminder and security
Your settings in the app.
- Under Profile you see your employment details. If you work for several companies, this is where you switch.
- Under Timer reminder, choose after how many working hours the app reminds you of a running timer (8 hours by default; pauses don’t count). Allow notifications for this.
- Under Security, protect the app with Face ID, your fingerprint or the device passcode.
- This is also where you change your password or sign out.
7Web app
Everything the app does, with more overview on a big screen.
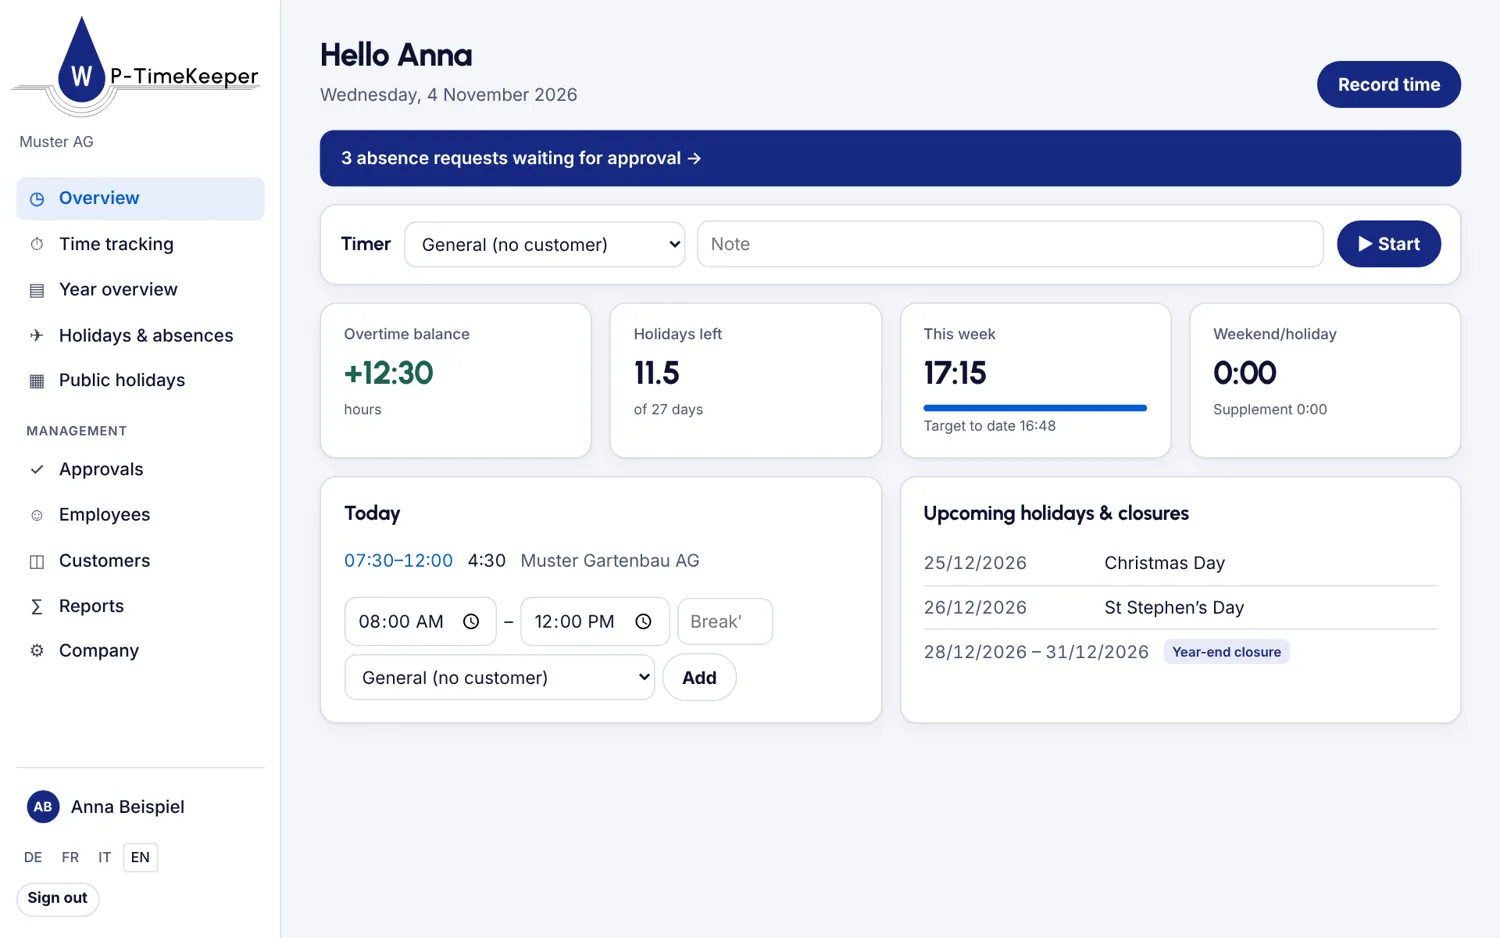
- Sign in at timekeeper.wpsolutions.ch. Overview shows the timer, overtime balance, holidays and the current week.
- Under Time tracking you edit your months; Year overview shows the whole year.
- Under Holidays & absences you request absences, including half days, and see the team calendar. Public holidays lists the holidays of your canton.
- Under My profile you choose your language and change your password.
8For managers: setting up your company
We open your company and the first manager gets an invitation. All administration happens in the web app.
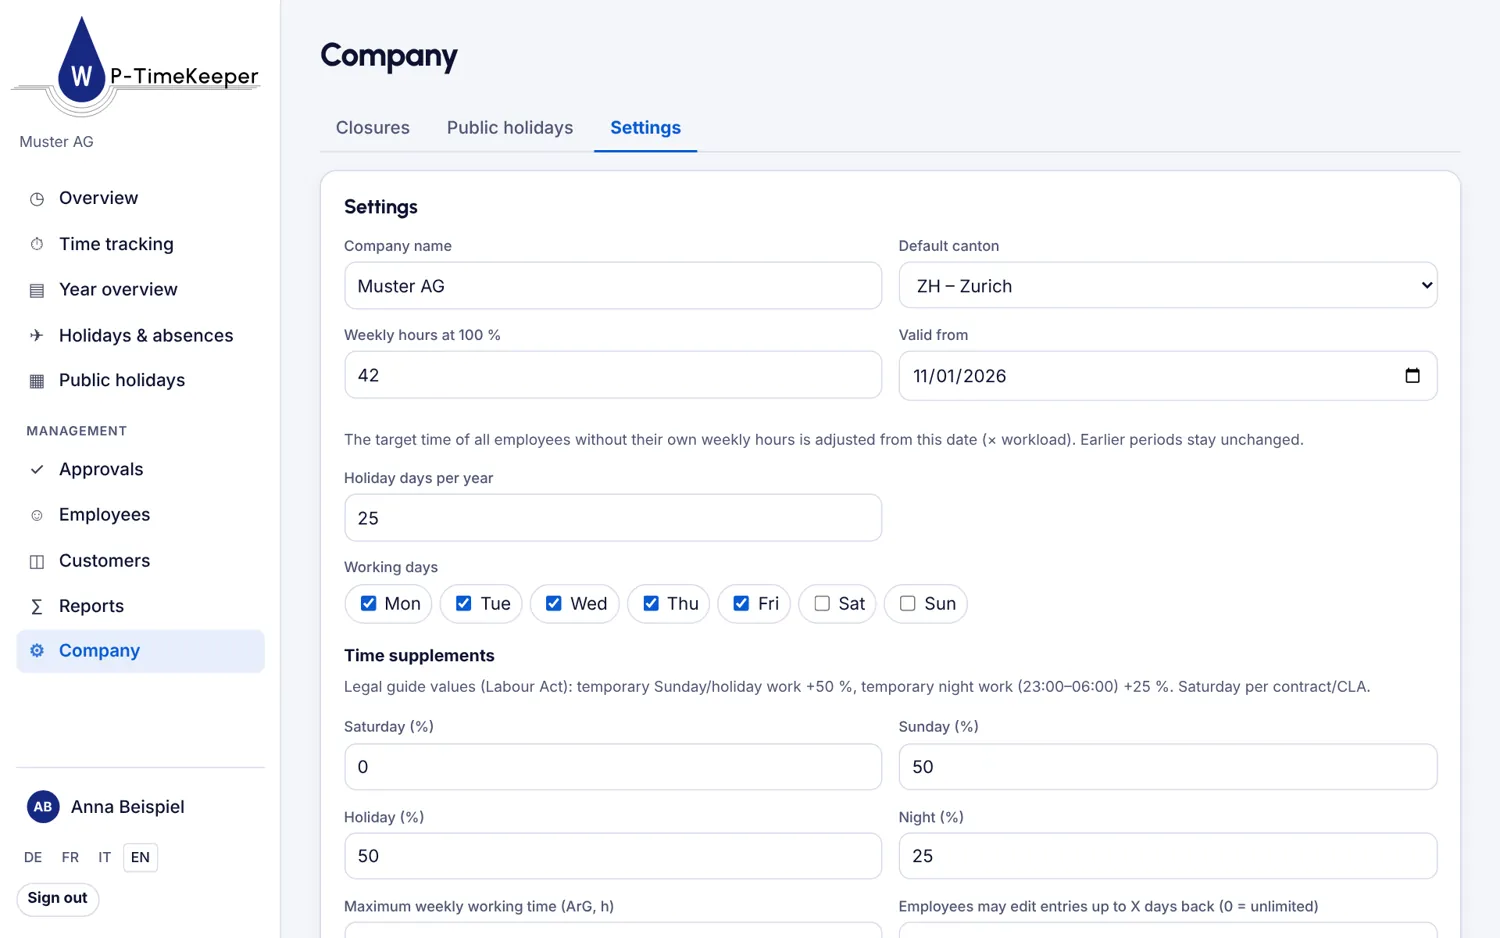
- Open Company → Settings. Set the default canton, Weekly hours at 100 % and holiday days, and choose the Working days.
- Check the Time supplements. Legal guide values: temporary Sunday and public holiday work +50 %, temporary night work (23–6) +25 %; Saturday according to contract or collective agreement.
- Decide how many days back employees may edit their entries.
- Under Closures, enter company closures and choose whether the days come off the holiday balance.
- Under Public holidays, check your canton’s template.
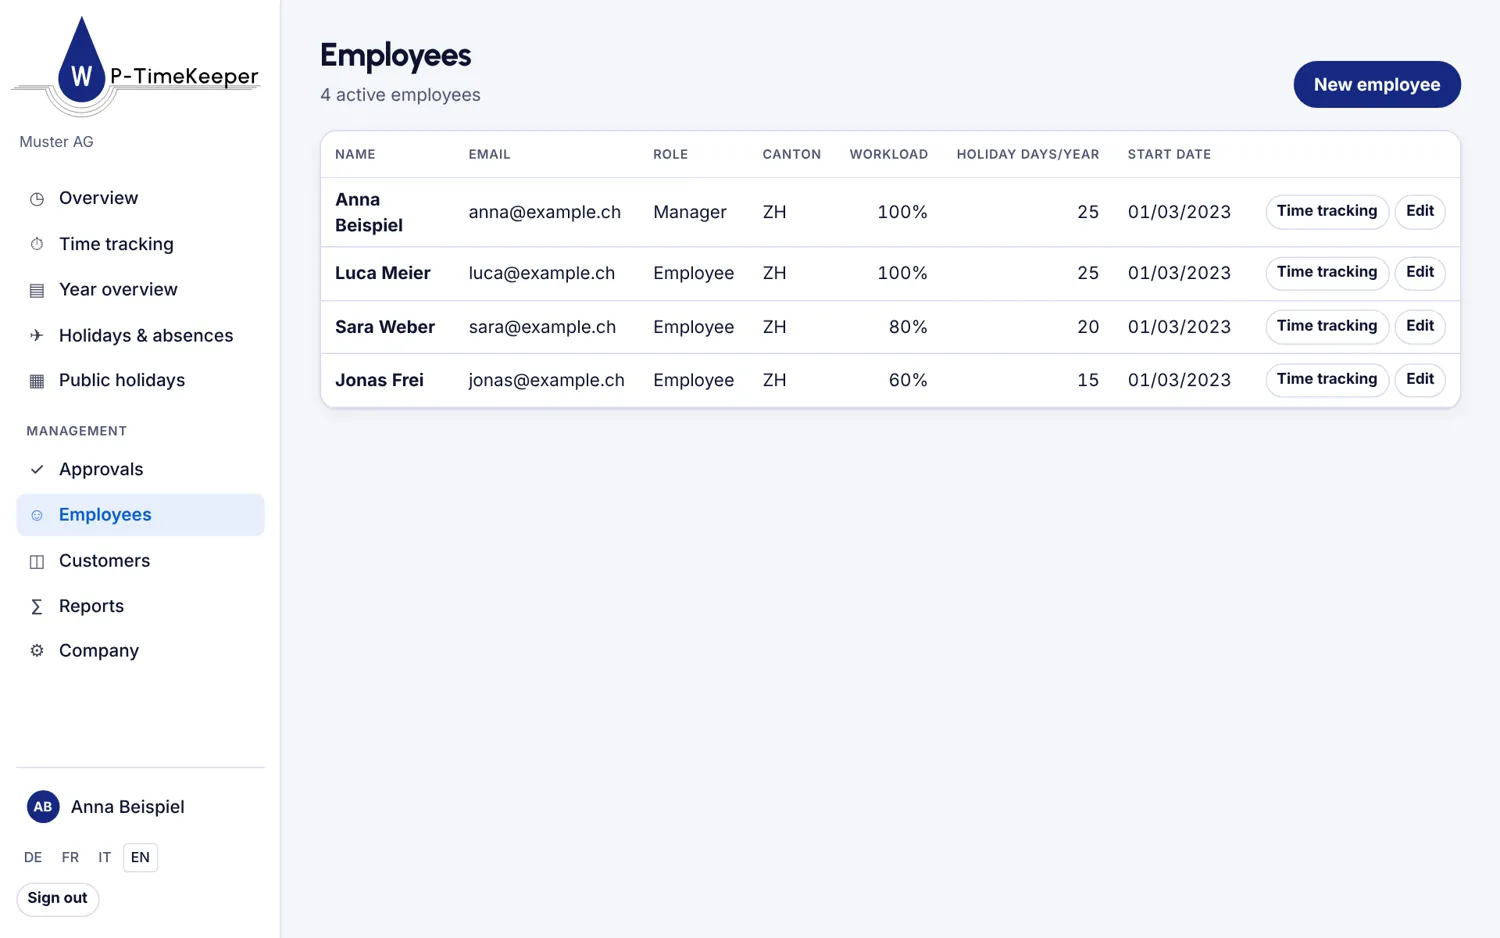
9For managers: employees
Add your team with workload and holiday entitlement.
- Open Employees and click New employee.
- Enter name, e-mail, role, canton, Workload, holiday days, Start date and year of birth.
- Send an invitation by e-mail, or pass on the temporary password securely.
- Switching from another system mid-year? Under Start in WP-TimeKeeper, enter Time tracking from plus the overtime balance and holidays left at the start.
10For managers: approving requests
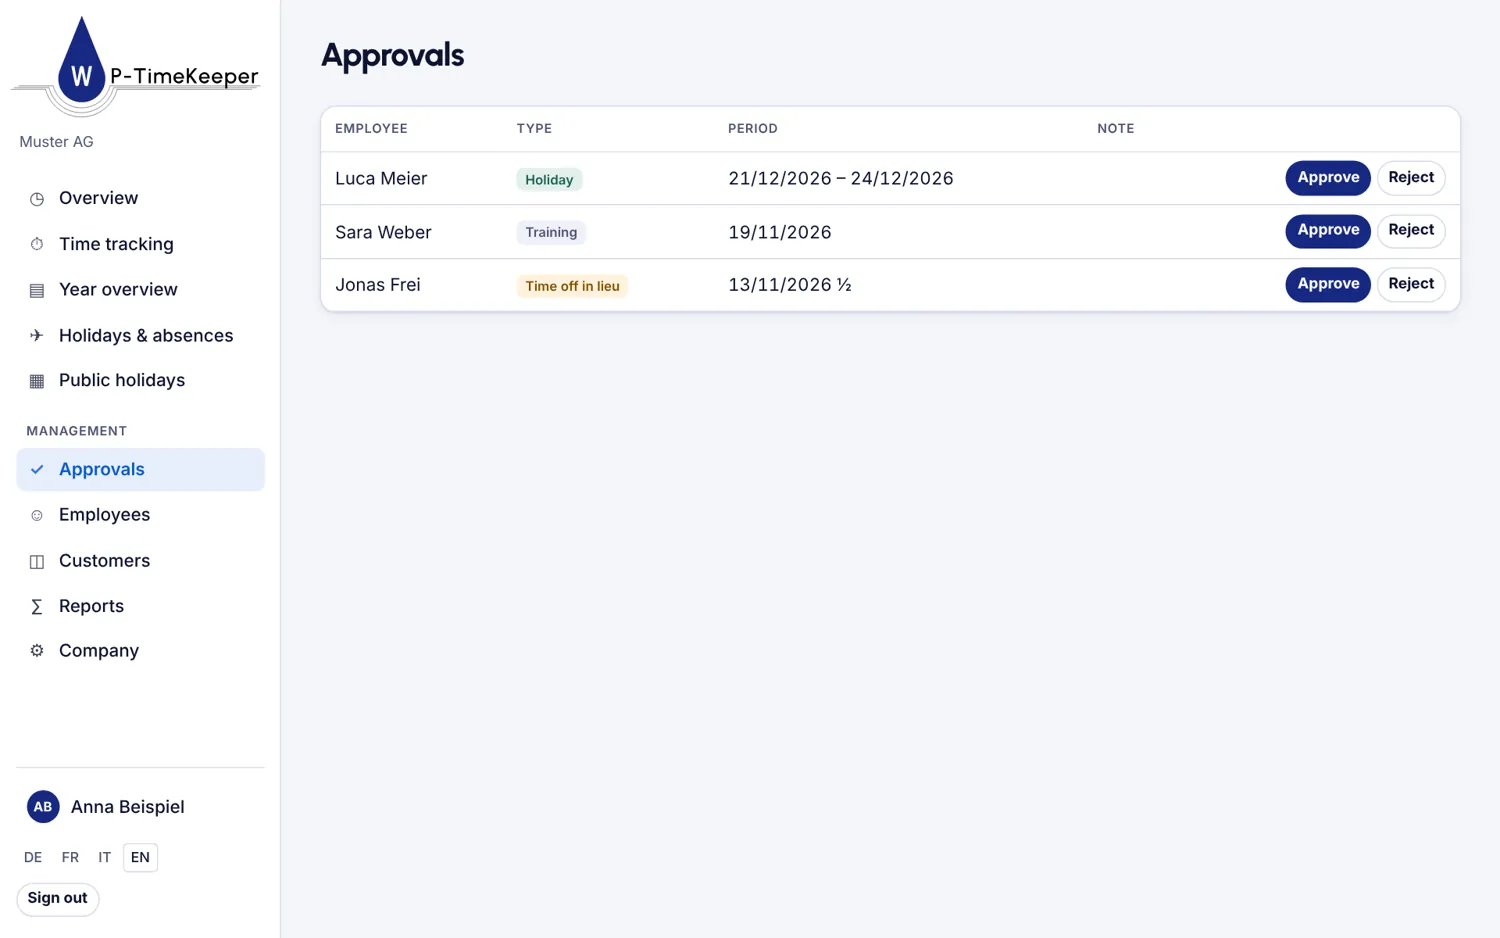
Open requests appear on your overview.
- Open Approvals. All open requests are listed with type and period.
- Click Approve or Reject.
11For managers: customers
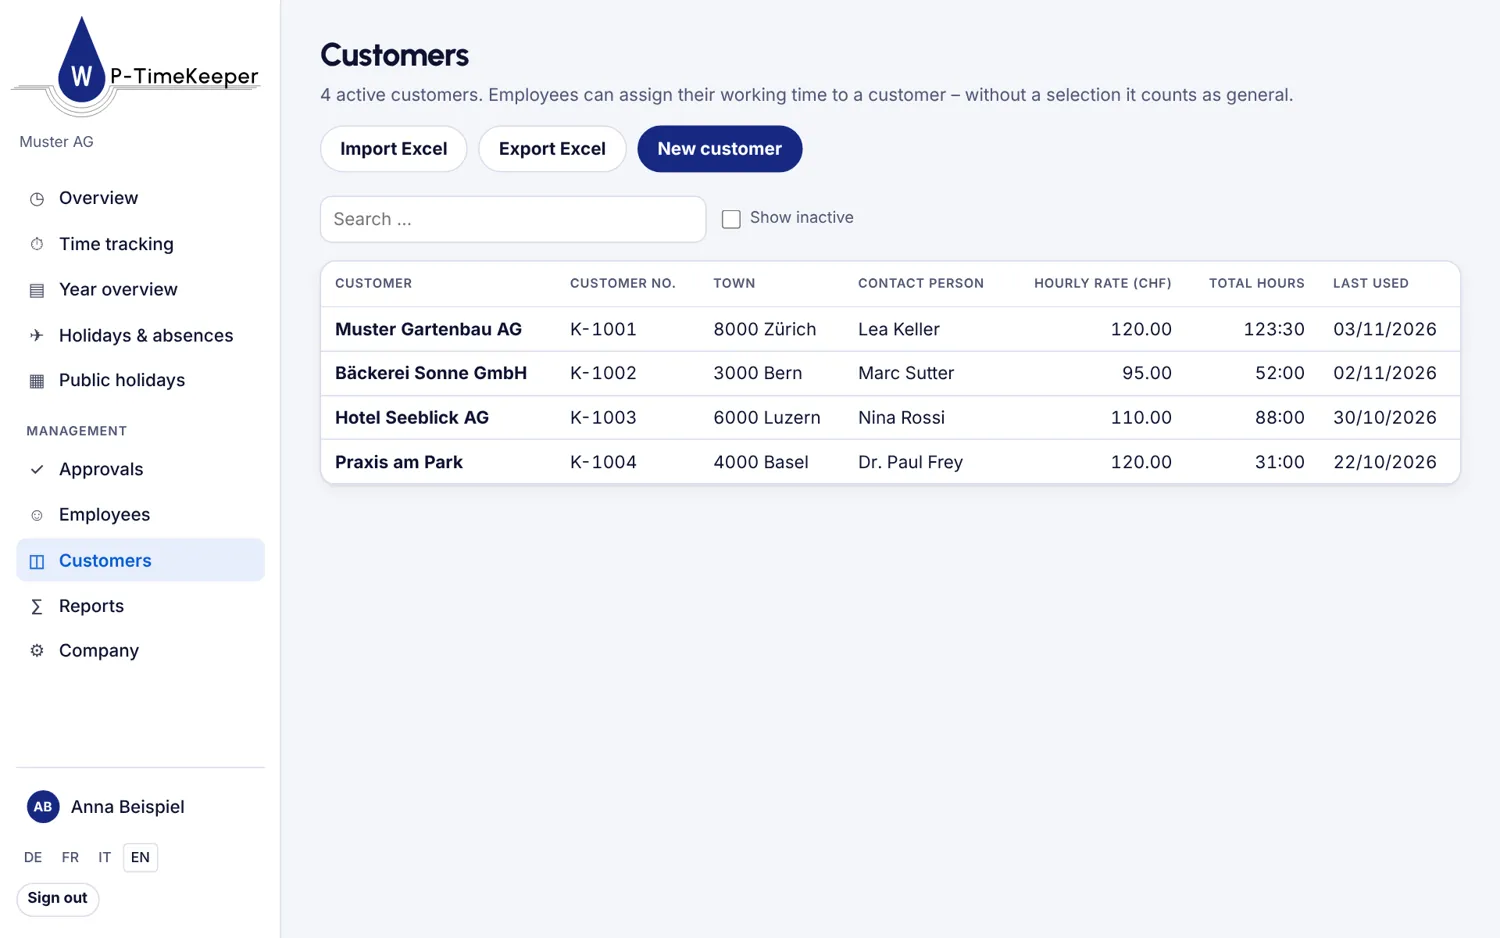
With customers, you can report working time per client.
- Open Customers and click New customer. An Hourly rate (CHF) is optional; it gives the amount in the report.
- Or click Import Excel and upload an .xlsx or .csv file, such as an export from WP-Invoicer or Bexio.
- Columns are detected automatically. Check the mapping; before saving, a check shows new, existing and faulty rows.
12For managers: reports
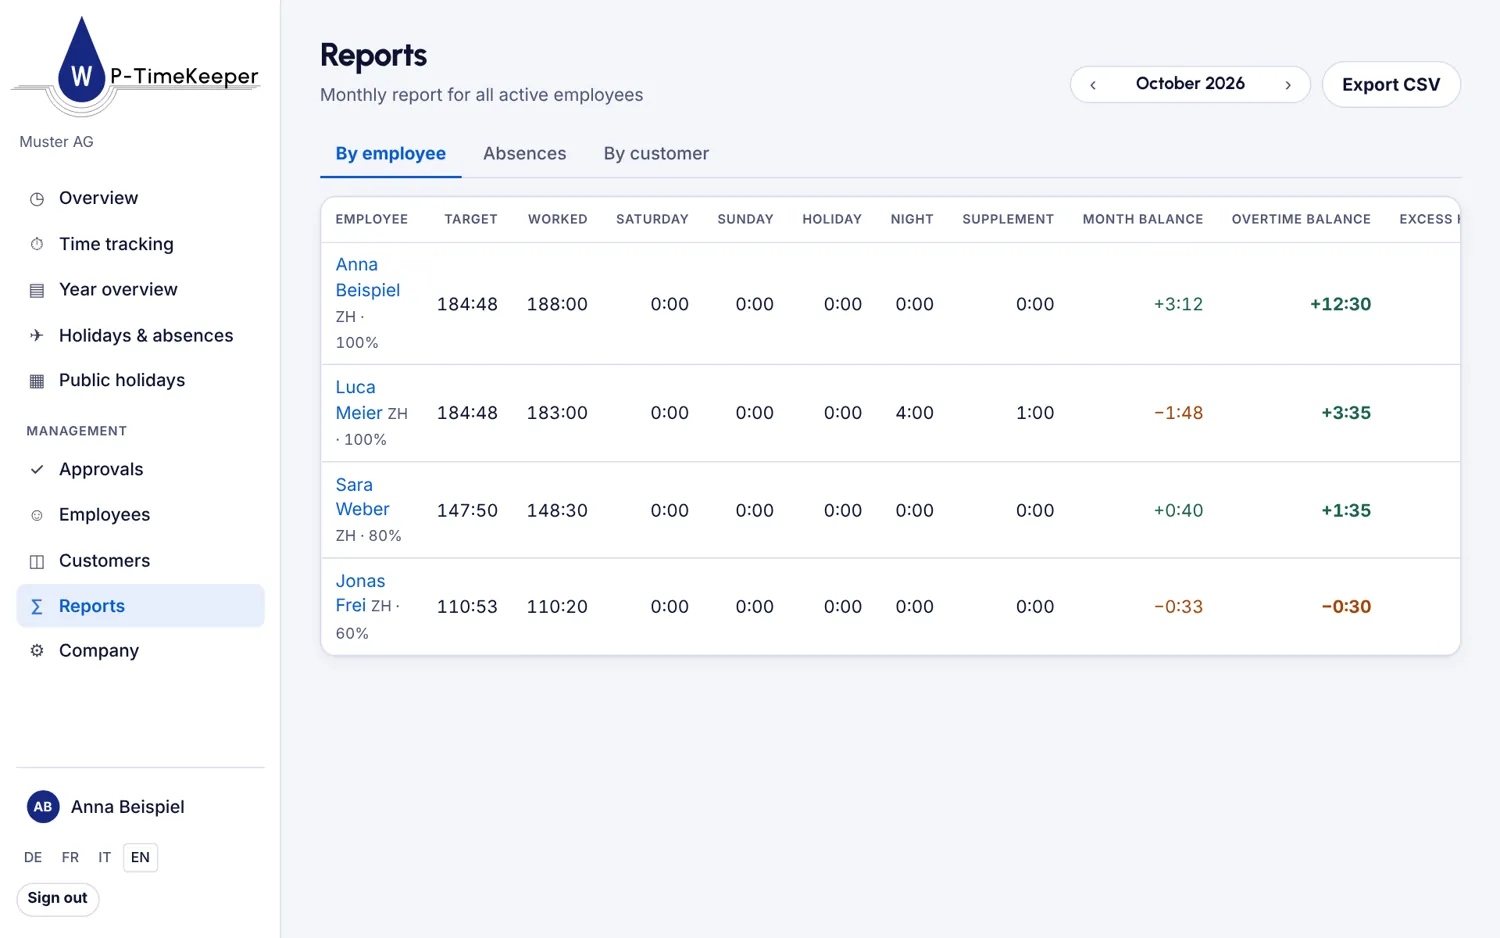
Three views, each with CSV export.
- By employee: per month, target, worked hours, Saturday, Sunday, holiday and night work, supplements, balance, overtime and holidays left.
- Absences: per year, sickness and accident with the number of cases, sickness rate, holidays and other absences.
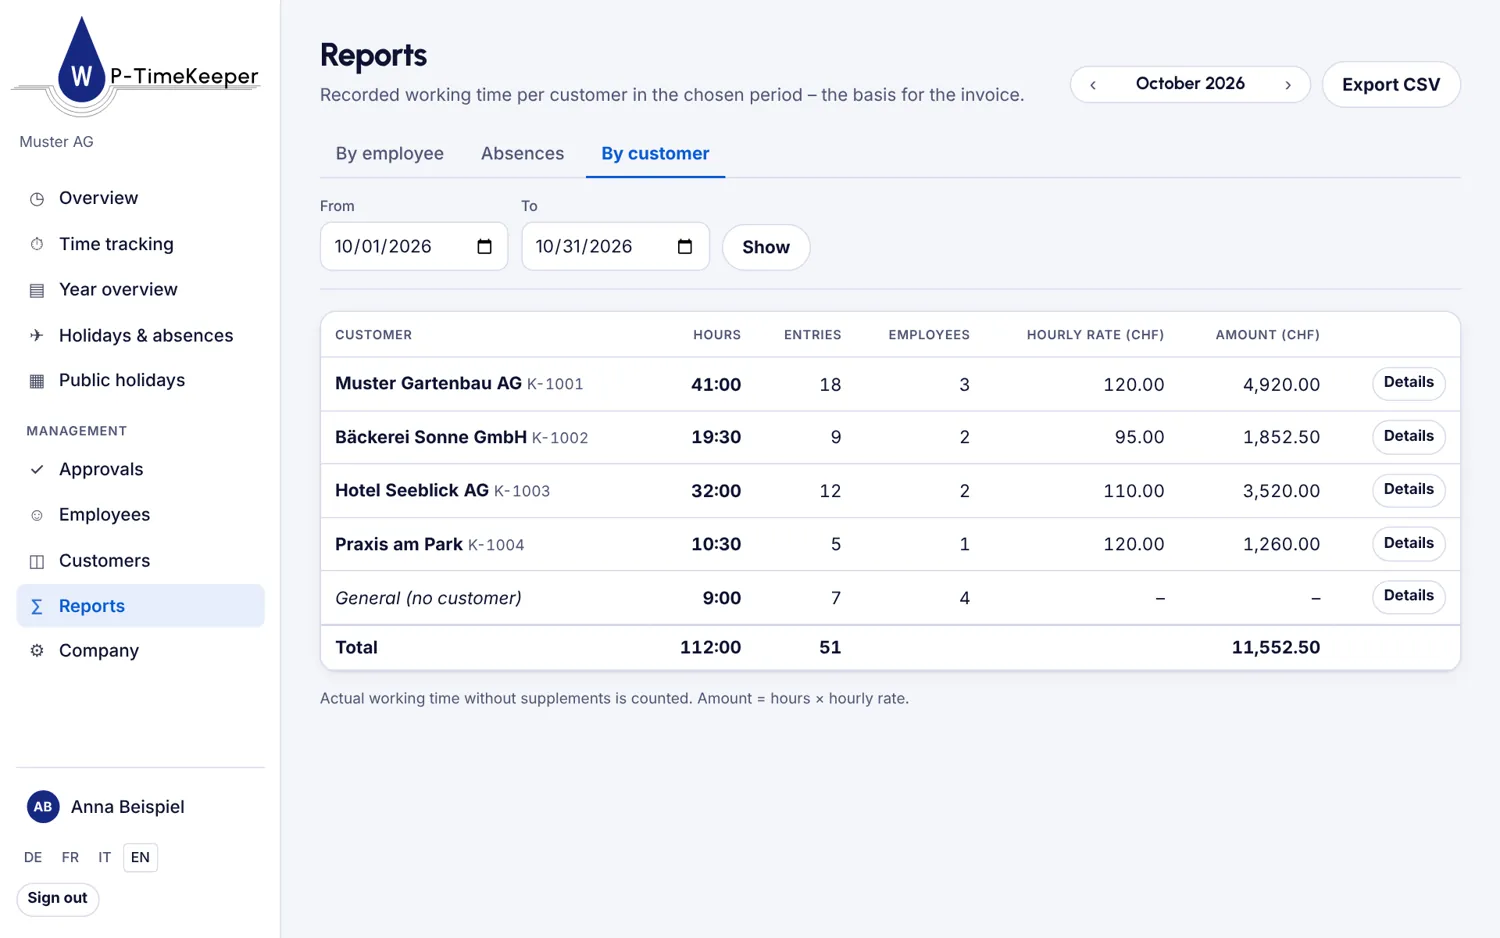
- By customer: hours, entries, hourly rate and amount for any period. Details lists every single entry.
- Click Export CSV to use the data elsewhere.
13Subscribing to the team calendar
Team absences, public holidays and closures in your calendar app.
- Managers switch on the team calendar for everyone under Company → Settings.
- Then everyone opens My profile in the web app and clicks Create subscription link under Team calendar.
- Open the link in Apple Calendar, Google Calendar, Outlook or on Android.
More questions?
The help page answers common questions, or write to us.